How To Install A Wireless Dog Fence
Wireless dog fences can be a brilliant containment tool when you have puppies in training and no physical boundary to your property. They can be far less stressful and time-consuming to install than an in-ground model and there are some great options out there.
However, there are also some important considerations to keep in mind when installing them correctly. After all, you need to be sure that your pet is secure at all time. Here are some tips on how to install a wireless dog fence.
1. Chose The Right Model For Your Property
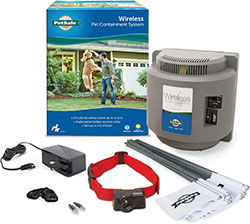
Finding the best wireless dog fence is important. You need a system that you are sure can be reliable with the right collar, training flags and the right range for your property. Look at the settings on offer so that you know that the product will be easy to use. Read all the user reviews and specification details carefully to make the right choice.
2. Determine The Perimeter Of The Boundary
All of these products have a minimum and maximum range from the transmitter and this creates your wireless boundary. The best are adjustable so that you can create spaces that are better suited to your needs and the shape of your property.
The round perimeters aren’t always ideal for square or misshapen properties but you can find a middle ground with some careful planning. Just make sure that no part of that circle overlaps into another property or out into the road.
3. Find A Place For The Transmitter That Is Safe And Reliable
The radius of the containment area is determined by the placement of the transmitter. Keep this in mind when choosing your range and location. You might have an outside outlet or one in a garage that you feel is perfect. Make sure that it is accessible and the right as central and not too off-centre for the property.
4. Keep The Transmitter Away From Metal
Also, be careful not to situate it too close to any metal objects. Metal can interfere with the signal and limit the range. Key factors here are cars and metal roof. This is an issue if you park your car outside within your desired containment area.
5. Get To Know The Settings Before You Start Involving Your Dog
It is important that you have a strong understanding of the setting and intensity of the collar before getting started with training. This makes it easier to determine the best means of correction and also provides some empathy with the experience of the animal. Is the tone going to be too loud for them? Is the static shock a little too much to deal with on the higher setting?
6. Attach The Disconnected Collar To Your Dog
Now your dog can get involved and get used to the collar. They need to feel comfortable wearing this device before they are let out near a live barrier. This is a foreign item and they need to be able to trust it before it starts making any noise or giving off static.
Make sure that it is a good fit too. The best wireless dog fence collars should be adjustable for different neck sizes and not too heavy. There should also be a strong, accessible clip for ease of use.
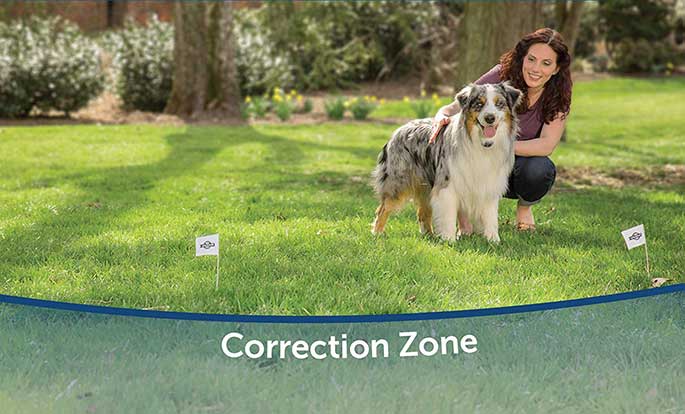
7. Set Up Training Flags On The Perimeter
If you were wondering what all those flags were for, now is your time to put them to good use. While your dog gets used to wearing their new collar, you can set up these training flags on the boundary. Hopefully, you will have plenty of these flags in the kit to ensure that you can create a nice ring of colourful flags.
This creates a visible boundary that you can both work with until it is time to switch on the transmitter and collar together. Walk around the boundary with the collar in hand and place a flag down whenever you hear the beep or feel the static. Don’t rely on measurements from the transmitter in case the boundary is a little uneven.
8. Help Your Dog To Understand This Boundary Of Flags
Now that you have a clear, visual boundary in place, it is time for your dog to investigate. Put them on a lead and walk them around the perimeter. Show them that they can’t go any further than this circle. Correct them if they stray over the line to show them that this isn’t permitted.
Give them time to understand that there are now restrictions on how far they can actually go within the yard. Use positive reinforcement when they return to the right side. Do this as often as you think is necessary for them to get the idea. Only remove the flag when you are sure that your dog has learned their lesson.
9. Show Your Dog What Happens With The Collar On
Next, you can take them out for training with the flags and boundary with their new collar on. Only this time you can set it up to the transmitter to the right settings. Show them what happens if they stray too far and continue to walk them around at a safe distance to get the message. Maintain that approach of positive reinforcement and praise when they do the right thing and don’t punish them further if they are slow to make the connection. Some dogs will take longer than others.
10. Take The Flags Away And Let Them Out On Their Own
Once you are sure that your dog is aware of the boundary and the consequences you can remove the flag, set up the collar and leave them to it. There may be times where they stray past the line because the flags aren’t there.
But, they will soon make the connection and realise that the border remains the same. Keep an eye on them for a while to make sure that the process is smooth and you can help them if they stray too far. Eventually, you will find that they no longer go too far and the training has been a success.


